How to Compact Hyper-V Windows VHD Disk File
Note that this instruction is for Windows VMs (not Linux).
It works for VHD and VHDx files as long as they use dynamic size (not fixed).
TL;DR
Shut down the Hyper-V VM.
Mount VHD as a drive in Windows (e.g. F:).
Run the following sequence as an Administrator (change F: to your drive).
defrag F: /H /X
defrag F: /H /K /L
defrag F: /H /X
defrag F: /H /K /L
Unmount VHD drive in Windows.
Use Hyper-V Manager to Compact Drive (Settings -> Hard Drive -> Edit -> Compact).
Slightly longer read
If you open Hyper-V Manager, go to VM settings and open VM Hard Drive, there are Inspect and Edit buttons.
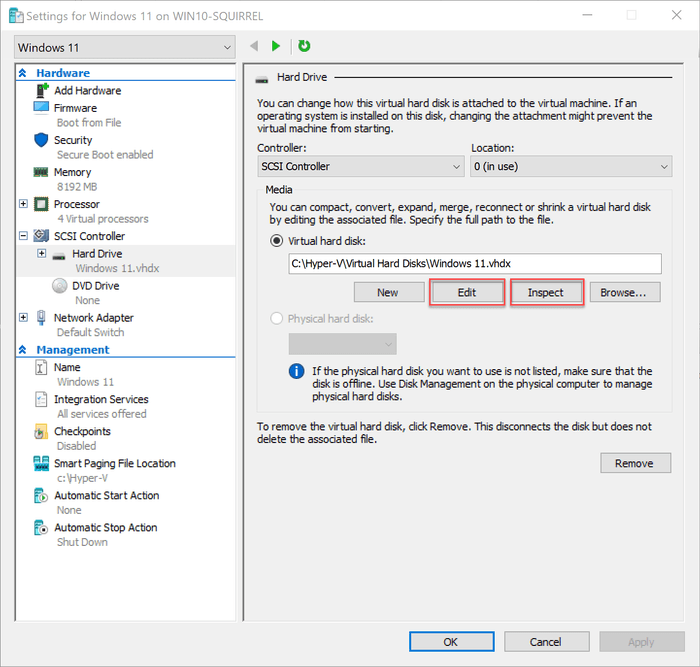
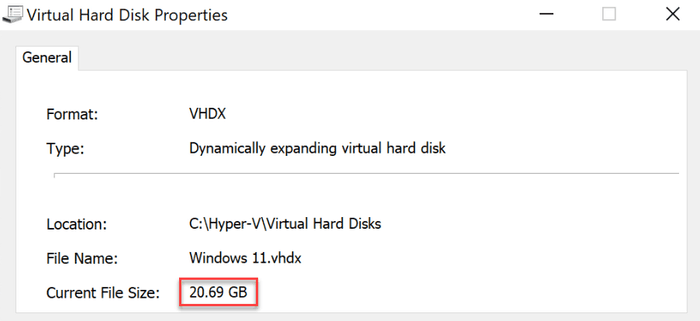
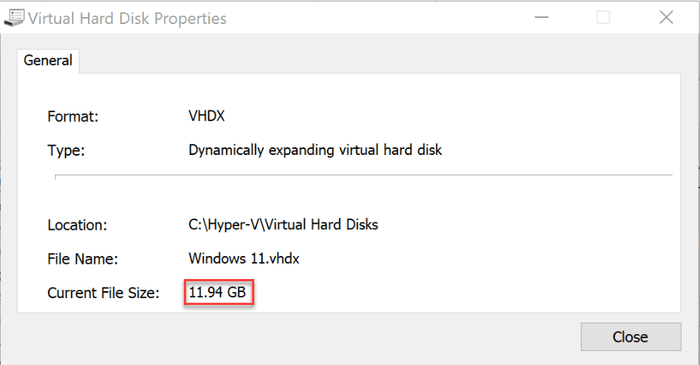
Click 'Inspect' to see how much space your virtual hard drive takes.
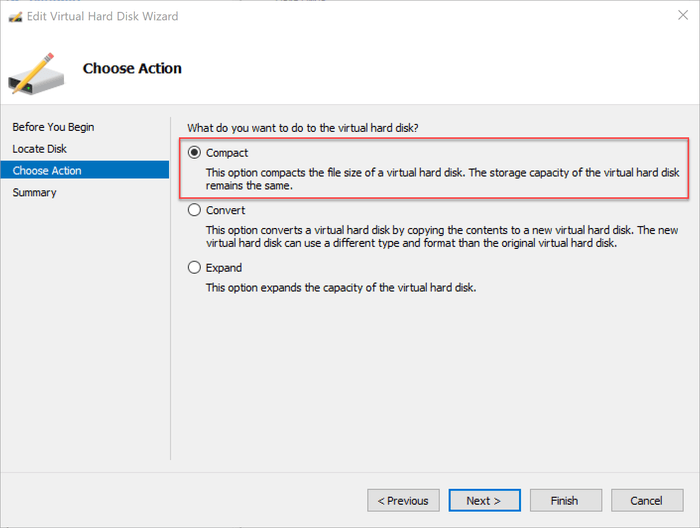
Click 'Edit', and eventually, you will get to the 'Compact' option.
Once the disk is compacted, the disk space savings are usually not that great.
The compact option simply trims the empty space at the end of the disk, and if data on the disk is spread all over the space, there is not much to trim.
To improve things, you need to defragment the disk, so the data takes continuous space at the beginning.
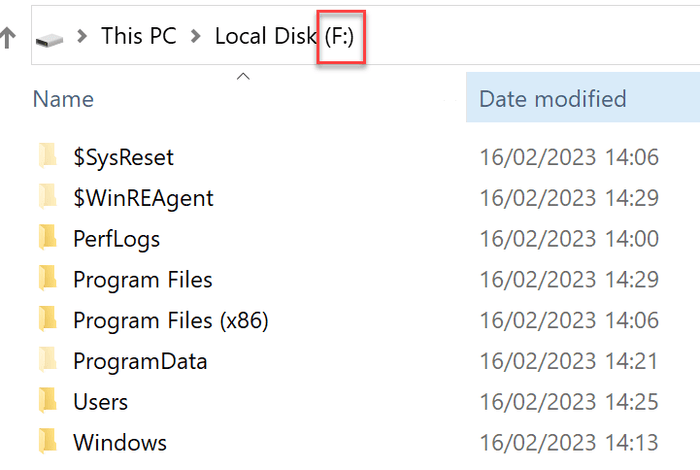
Open Windows Explorer and mount the VHD drive.
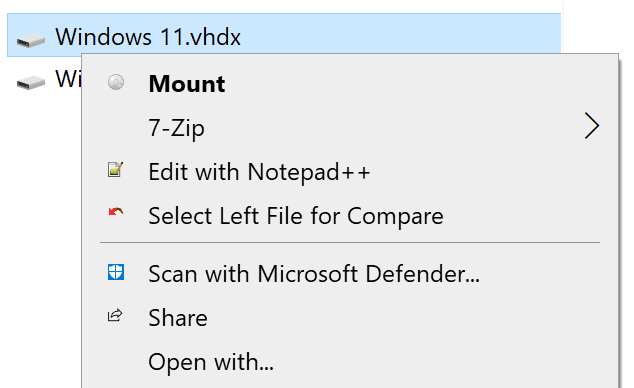
In this case, VHD has been mounted as F: drive.
Open Command Line as an Administrator and type the defragmentation incantation. Replace the 'F:' with your drive letter.
defrag F: /H /X
defrag F: /H /K /L
defrag F: /H /X
defrag F: /H /K /L
The first line defragments the disk; the second line consolidates free space at the end of the disk.
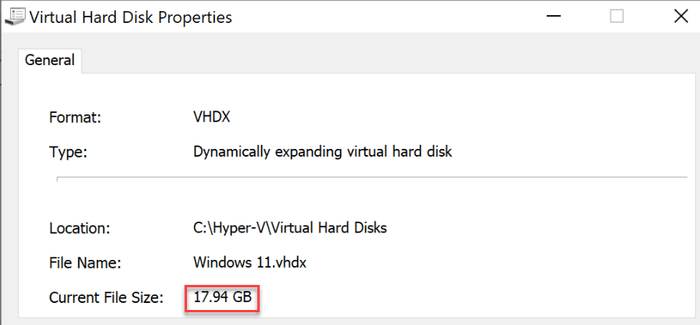
Then the process is repeated, as I've noticed that repeating it results in extra free space (500MB in this case).
Now you can unmount the F: drive and compact it again. The final result is 8GB of space reclaimed.
Command line
You can use diskpart command line tool (as an Administrator) to attach, detach and compact disks.
diskpart

DISKPART> select vdisk file="C:\Hyper-V\Virtual Hard Disks\Windows 11.vhdx"
DISKPART> attach vdisk

*** At this point, open new command-line window and run defrag commands ***

DISKPART> detach vdisk
DISKPART> compact vdisk
DISKPART> exit
PowerShell
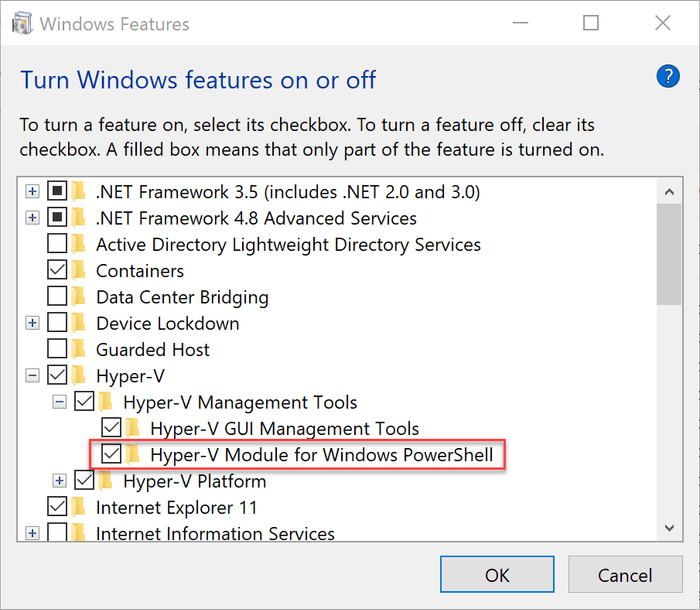
Make sure that you have Hyper-V Module for Windows PowerShell installed.
Run the following PowerShell commands as an Administrator.
$vhdFile = "C:\Temp\VHDTest\Windows 11.vhdx"
Mount-VHD $vhdFile
defrag F: /H /X
defrag F: /H /K /L
defrag F: /H /X
defrag F: /H /K /L
Dismount-VHD $vhdFile
Optimize-VHD $vhdFile